- Advantos ERP v7 Online Documentation
- Admin Manual
- Contact Us
Process Bank Deposits
|
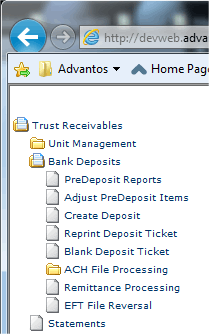
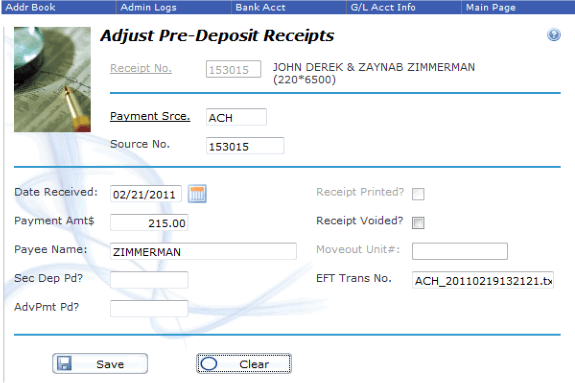
IntroductionThe purpose of this process is to create bank deposits through T/R and update resident account balances and transactions history. This also updates the Bank Account module with deposit information. The T/R module has a "Bank Deposits" subsection that provides all necessary tools to manage any and all parts of the bank deposit process. These tools are designed to improve efficiency and reduce errors during this process. Post PaymentsRefer to the T/R menu Post Receipts procedure for guidelines on posting receipts. Payments can also be posted through Remittance Processing or ACH Processing. When a receipt is posted, from whatever the source, it is held as a memo or Pre Deposit item until the deposit is processed. Undeposited amounts are displayed in red on the T/R Maintain Unit and the Adjust Account screens. Pre-Deposits may also be listed using the Undeposited Payments menu option. This is especially useful when off-site managers make deposits and you wish to know how much money is being held. Pre-Deposit ProceduresBefore running the Create Deposit option, use the Pre-Deposit reports to validate that all posted receipts are accounted for and the total of actual items (checks, cash, credit cards, etc) equals what has been posted to the T/R module. Be careful payments are not being posted while you are in the process of validating Pre-deposits! In addition to validating totals, you should review to ensure payments have been posted to the correct residents. From within the Pre-Deposit report, you may click on the blue Receipt Number to make any corrections. You may also use the Adjust PreDeposit Items menu option. You may change the amount received or click on Receipt Voided? to void the receipt. A voided receipt cannot be changed. Please note that only the System Administrator is permitted to void a cash receipt where a printed receipt was issued.
Funds received are either posted manually through the Post Receipts process, or electronically through the Remittance Processing process or the ACH Transfer Processing process or the credit card process. Since all deposits create a single deposit transaction, manual and electronic deposits cannot be processed together in one batch. Process Bank DepositsOnce you are certain the receipts are balanced, you can run the Create Deposit process. The system will give you a grand total to verify the deposit, then send deposit tickets (for manual receipts) to the printer. No deposit ticket will be created for electronic receipts, as these receipts have already been deposited. You must insert the Micr-encode toner and use the special deposit ticket forms in order to print the deposit tickets. The deposit tickets are designed to print on both the front and back of the paper, so that you have two deposit tickets. As such, you need to take the first printed output and reverse it in the printer and print the deposit tickets a second time. When the deposit tickets are printed, receipts will be posted to resident accounts, their ledger history and the running bank account. Correcting a DepositIf for some reason you need to correct a deposited item once it has been posted to the system, you'll need to reverse the receipt in question, then redeposit the single item. You may discard the deposit slips if the item has already gone to the bank. Be sure to review the Bank Account System to ensure it reflects the correction. Payment Application RulesPayments are applied to accounts using certain application rules. These rules are defined in the configuration file apply-rules and look like the following:
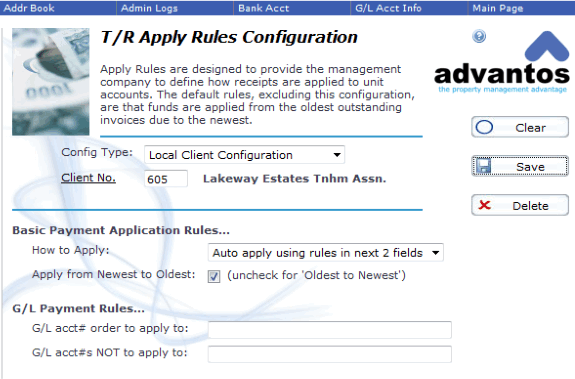
Advantos Systems will complete this after discussing your needs with you. This configuration file above is designed to control the rules of how to apply payments/funds to the outstanding invoices on a T/R account/unit. For example, if a resident owes $315 and it is broken down as $150 in a primary charge for this month, $150 in a primary charge for last month and a $15 late charge for this month, and the resident pays $160, how should the software apply the payments? The apply-rules instructs the software on which invoice to post the payment to. A single apply-rules can apply to ALL your properties. However, you can have APPLY RULES that apply to specific properties by having a rule for a specific property, for example. In the example above, line #3 indicates that the funds will first be applied to GL Acct 4100, then to 4200, then to whatever is remaining. Line #2 indicates that within those GLAccts, the funds will be applied to the newest invoice first, then to the next newest invoice etc. Line #4 indicates that in no event will funds be automatically posted to invoices with GL Acct 4300. In the example above, then, the $160 paid by the resident will be posted first to current month Primary Charge (Acct No 4100) for $150, then to last month Primary Charge for $10 The apply-rules default is '0' in line #1 and #2. In that event, funds will be automatically posted only if the payment is greater than or equal to the customer balance. Documentation for the above 5 lines is outlined below:
Using this configuration file, payments will be applied in the T/R module according to the rules above. If the receipt does not fit into one of the above rules then the payment will be applied to ADVPMT at the time of deposit and will stay there until you make a decision using the Adjustments Program. ADVPMT is a hold category where payments on account have not been applied, and is considered 'Prepaid Income' on the financial statements. The value in this category is posted to the G/L as Deferred (or Prepaid) Income. If you don't apply the funds held on account, the financial statements will reflect both excess Tenants Receivable and Prepaid Income. Once the funds are applied then the system reduces these two G/L account balances. |


